An example to go further
Contents:
User Story
We want to test a few web services in a SUT (System Under Test).
In order to test the web services, we’ll also need to inject some SQL.
Since we want to be able to use our test wherever we want, we can change the host address easily.
Our web service testing tool will be SoapUI.
To end our test, we should clean the database.
Pre-requisites
You will need docker and docker-compose installed on your system.
In our example, we’ll be running docker on a Linux system. The rest of the example can be executed on any OS.
Context
The SUT is jacksonviews. It’ll be deployed with docker and coupled with a pgSQL 10 database that’ll be automatically downloaded during the docker-compose.
Download the compressed image of the jacksonviews, available here. Open a shell in the directory where the compressed image is located and decompress it with the following command (Linux) :
| tar xvf jackson_image.tar |
Once untarred, just run the following commands :
| sudo docker load -i jacksonviews.tar |
| sudo docker-compose -f docker/app.yml up -d |
The SUT will then be available on any OS at : http://{host address}:8080
Structure of the test file (or SKF script)
First of all, we should think about how to organize our test file.
Let’s start with the user story.
Our main goal is to test the web services, so that’ll be the TEST phase.
In order to test it correctly, we’ll need a few dataset and specify the host where the SUT is available. That’ll be the SETUP phase.
The clean up comes after the test phase, it is used just to rollback to the initial status. That’ll be the TEARDOWN phase.
Additionally, if the test file is to be automated via a test management platform (for example Squash TM), we’ll need a section named METADATA to store the credentials.
| Phases: | We want to test a few web services in SUT (System Under Test): |
|---|---|
| METADATA | To associate this test script with a Test case in a Test Management platform. |
| SETUP | In order to test the web services, we’ll need to inject some SQL. To use our test wherever we want, we can easily change host address. |
| TEST | Our web service testing tool will be SoapUI. |
| TEARDOWN | To end our test, we should clean the database. |
Create a project
Let’s start with a clean project. You can use the squash-ta archetype with the latest version.
If you don’t know how to generate a maven archetype, you can follow our guide.
You can delete all the samples in the generated project, just keep the structure.
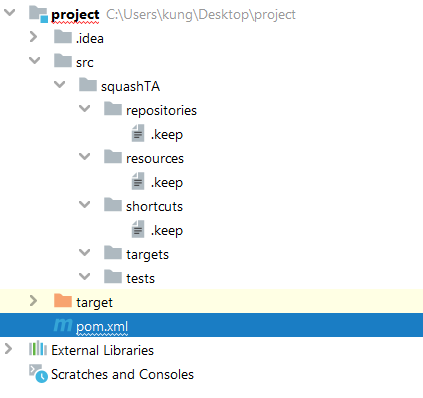
Fig 1. Clean SKF project
Interact with the database
“In order to test the web services, we’ll need to inject some SQL.”
To interact with a database, we’ll need three things.
The first one is a .properties file put in the targets folder (be careful about the name, targets != target).
The .properties file should have the following properties :
- #!db : The shebang to indicate that this file contains informations about a database.
- squashtest.ta.database.driver : The driver to be used.
- squashtest.ta.database.url : The path to the database.
- squashtest.ta.database.username : The username to use to connect to the database.
- squashtest.ta.database.password (optional, not used in our example) : The password to use to connect to the database.
In our example, it will be as follow :
#!db
squashtest.ta.database.driver=org.postgresql.Driver
squashtest.ta.database.url=jdbc:postgresql://{host_address}:5432/jacksonviews
squashtest.ta.database.username=jacksonviews
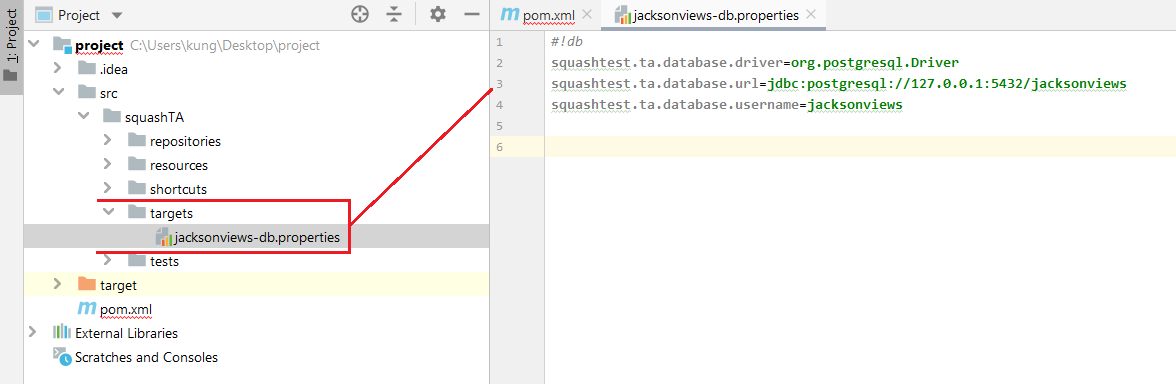
Fig 2. .properties file to connect to a database
The second one is of course the query to use in the database.
We can define it inline (directly in the macro) or we can put it in a file that’ll be loaded by the macro.
In general, it’s better to put it in a file for readability and to facilitate changes.
In this case, we’ll use the .sql file (both options will be shown later during the TEST phase).
We just need to create a .sql file in the resources folder and write all the queries inside.
In our example, we’ll insert a row in the table jac_contact of our database by adding the following line to add_contact.sql :
INSERT INTO jac_contact VALUES (1, 'John', 'Smith', 'foo@foo.foo', 39);
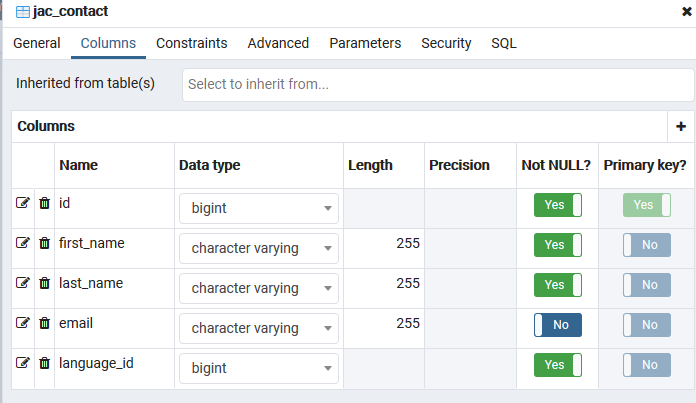
Fig 3. Contact table in the Db
It’s good practice to create different subfolders for each type of resources (sql, selenium, soapui, etc).

Fig 4. .sql file containing the query
The third one is to add the jdbc driver to the pom.xml.
It’s of course dependent of the database. In our case it’ll be pgSQL.
The dependency is in the squash-ta-maven-plugin declaration.
<dependencies>
     <dependency>
        <groupId>org.postgresql</groupId>
        <artifactId>postgresql</artifactId>
        <version>42.2.5</version>
    </dependency>
</dependencies>
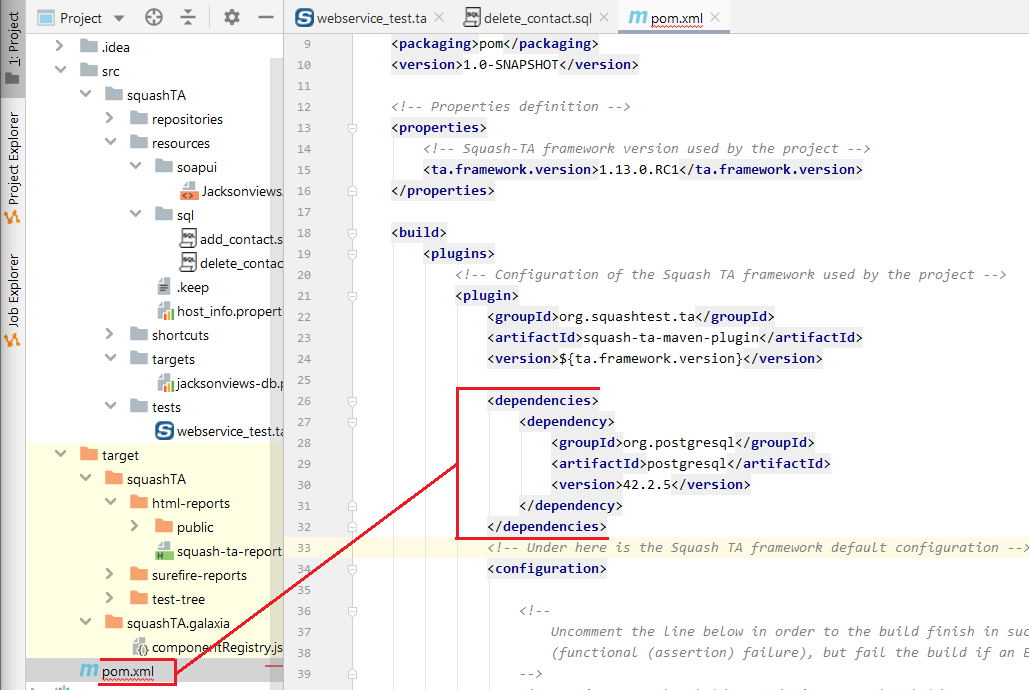
Fig 5. Dependency to add in the pom.xml
Create an SKF Script
Now that we have all the prerequisites, we can create our first .ta script.
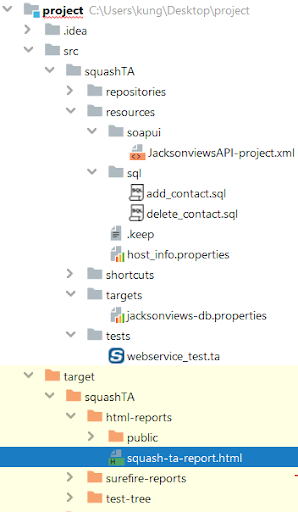
Since all the test files should be in the tests folder, this one is no exception.
The first thing to do is to add the SETUP phase that’ll be used before the test itself to add the necessary data.
We can then use the following macro to execute the query on the database :
| # EXECUTE_SQL sql/add_contact.sql ON jacksonviews-db AS query_result |
sql/add_contact.sql: The .sql file with the queryjacksonviews-db: The .properties file in the targets folder to specify the databasequery_result: The result of the query
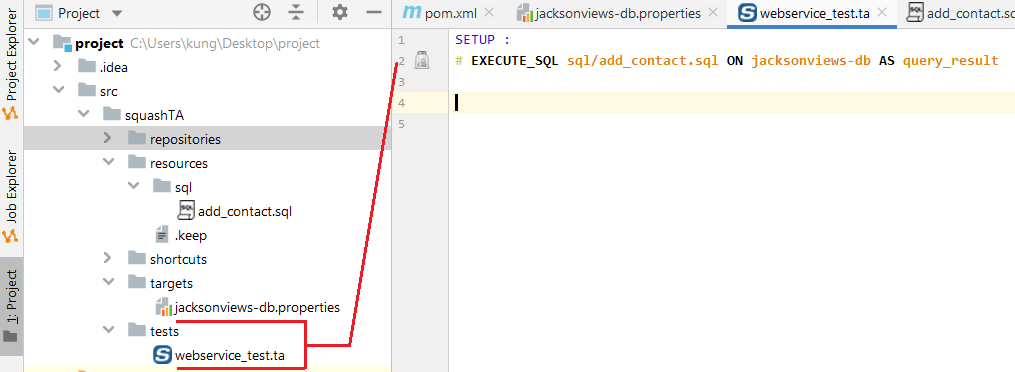
Fig 6. EXECUTE_SQL macro in .ta file
For more informations on the macro, please check the following page.
Change host address
“To use our test wherever we want, we can easily change host address.”
To change the host address, we will add the following macro to the SETUP phase of our script :
| # SUBSTITUTE KEYS IN {files} USING {key_value_list} AS {processed_files} |
For more information, please check the following page.
We’ll need this macro to change the SoapUI XML project that’ll be used later for the TEST phase.
Let’s add the SoapUI project to our resources folder. You can copy the content of this file in a JacksonviewsAPI-project.xml (or right-click and save it) and use it for our example.
Just like the .sql, it’s good practice to put it in a subfolder (a soapui folder in our example).
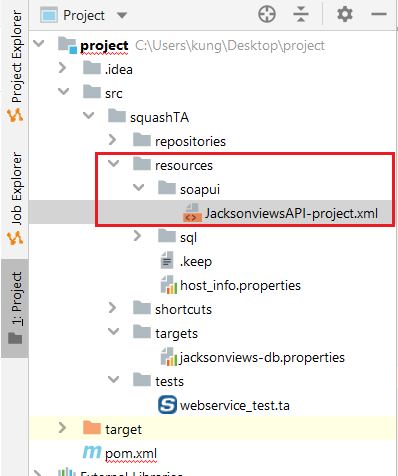
Fig 7. SoapUI project location
To perform the substitution of the host address specified in the project’s xml file, we added placeholders defined with $(key_name), and the value will be stored in a key=value list that can be defined inline or in a .properties file.

Fig 8. SoapUI project with placeholders
In our case we’ll make a host_info.properties that we’ll place at the base of the resources folder, and specify the host address :
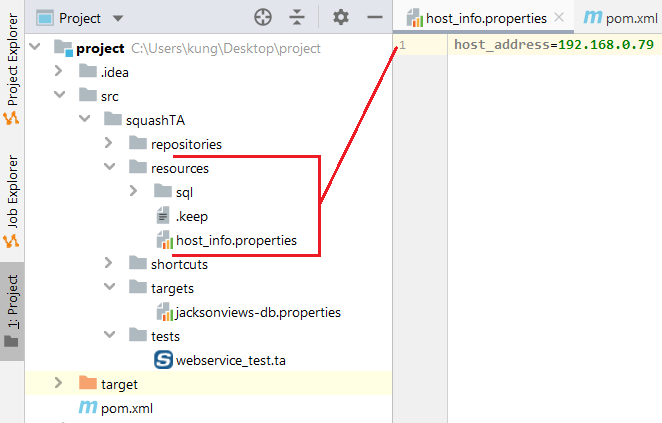
Fig 9. .properties file with the values needed for the substitute keys macro
You need to change the URL in the jacksonviews-db.properties directly, or specify it as an option during the Maven execution with the following syntax :
| -Dfilename_without_type.property=value |
For example :
| -Djacksonviews-db.squashtest.ta.database.url=jdbc:postgresql://192.168.0.178:5432/jacksonviews |
We can now add the SUBSTITUTE KEYS macro to the .ta file, after the execution macro in the SETUP phase.
| # SUBSTITUTE KEYS IN soapui/JacksonviewsAPI-project.xml USING host_info.properties AS modified-soap |
soapui/JacksonviewsAPI-project.xml: The SoapUI project exported in XML.host_info.properties: Property file with the key=value to use by the macro.modified-soap: Result of the instruction.
If you’d rather indicate the key=value inline, you can use the following syntax :
| # SUBSTITUTE KEYS IN soapui/JacksonviewsAPI-project.xml USING $(host_address=192.168.0.79) AS modified-soap |
In the case of multiple key=value, we need to add an “\n” to indicate each newline.
For example :
| $(host_address=192.168.0.79 \n my_second_key=my_second_value) |
You should now have the following script :

Test the webservice
“Our web service testing tool will be SoapUI.”
The SETUP phase is finished, we can now begin the TEST phase.
We can execute our SoapUI project with the following macro :
| # EXECUTE_SOAPUI modified-soap |
modified-soap: The result from the SUBSTITUTE KEYS macro with the right URL to connect to the API.
The SoapUI project use the getContact API to check that all the informations added through the SQL query are available.
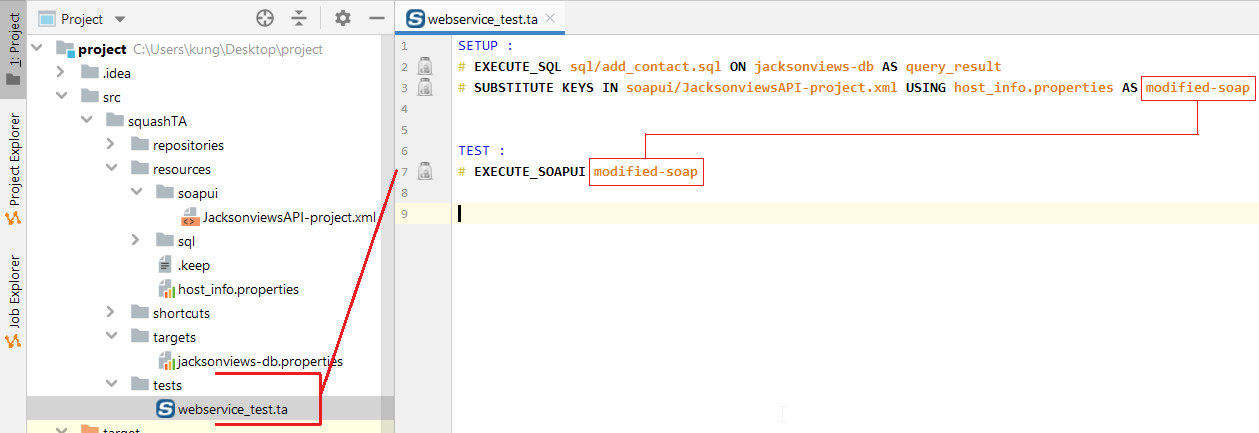
Fig 10. Test phase with an EXECUTE_SOAPUI
For more information, check the following page.
Clean the database
“To end our test, we should clean the database.”
We’re now trying to clean our past operations. That’s the TEARDOWN phase.
The target property is already created so we just need to create a .sql file.
In our examle, we’ll delete the row we created in the table jac_contact of our database during the SETUP phase by adding the following line to delete_contact.sql :
| DELETE FROM jac_contact WHERE id=1; |
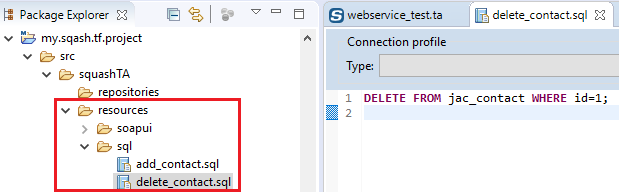
Fig 11. .sql for the TEARDOWN phase
We can then call the macro, just like in the SETUP phase :
| # EXECUTE_SQL sql/delete_contact.sql ON jacksonviews-db AS teardown_result |
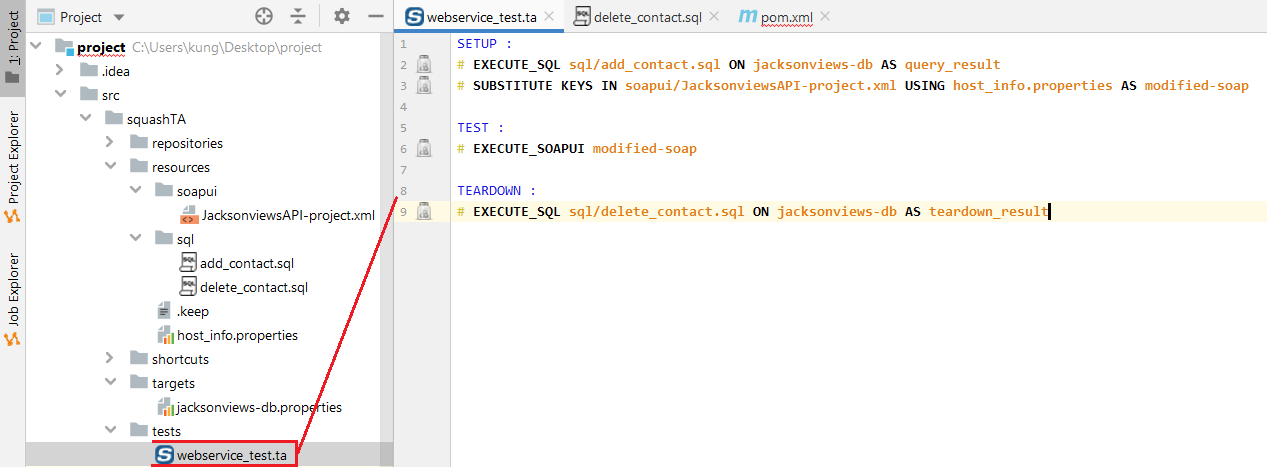
Fig 12. TEARDOWN phase in a .ta script
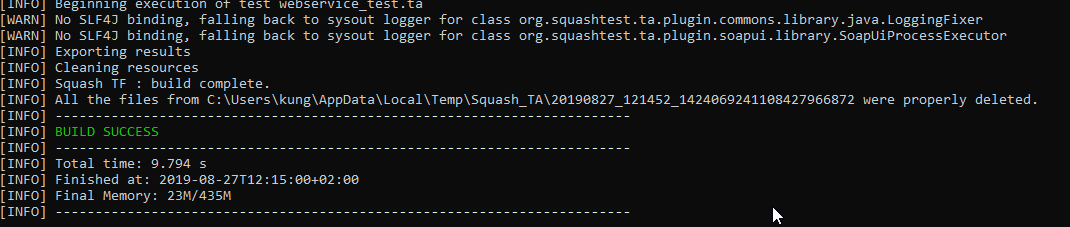
Execution
The test is now finished.
We can start the test by typing the following command in a shell window opened at the base of your project (where the pom.xml is located) :
| mvn squash-ta:run |
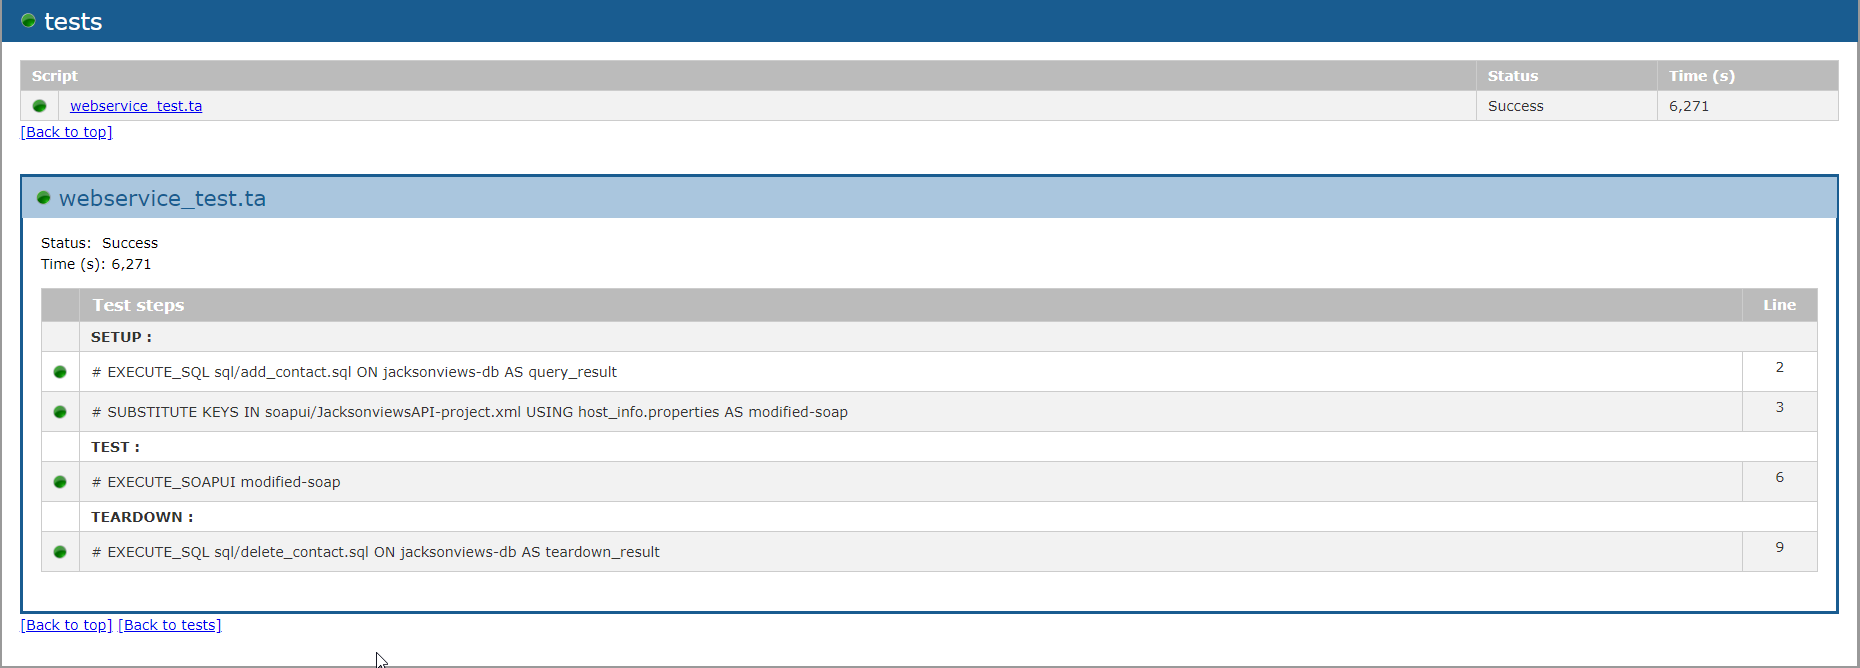
We should have a build success.